
Well, hello! It’s time to share some fall themed scrapbook layouts. I made the layouts below using the Fall Y’all Collection from Creative Memories and will be sharing a few more layouts in a few days. I absolutely love the color palette of this collection which contains a mix of purples and navy with the more traditional fall shades of orange, green and gold. I also love the ledger and grid print papers in the It’s Fall Y’all Tone-on-Tone Paper Pack. The embellishments are super cute, and some contain a white matte foil stitched design for a truly charming touch.

I created my first layout with a fun grid technique. I used the discontinued Jumbo Scallop Circle Cutting Pattern, but you can easily substitute our Jumbo Circle Cutting Pattern or any of our other older jumbo patterns. I finished my layout with a laser cut border, two stickers and a variety mat cut into an oval. All of these pieces are also from the It’s Fall Y’all Collection.

Please see my You Tube Channel to view an instructional video of how to create this layout.
I would love to see your version of this layout! Please join my private Facebook group, Karyn’s Croppers, and use this technique to make your own layout and share it into the appropriate Album in Karyn’s Croppers.
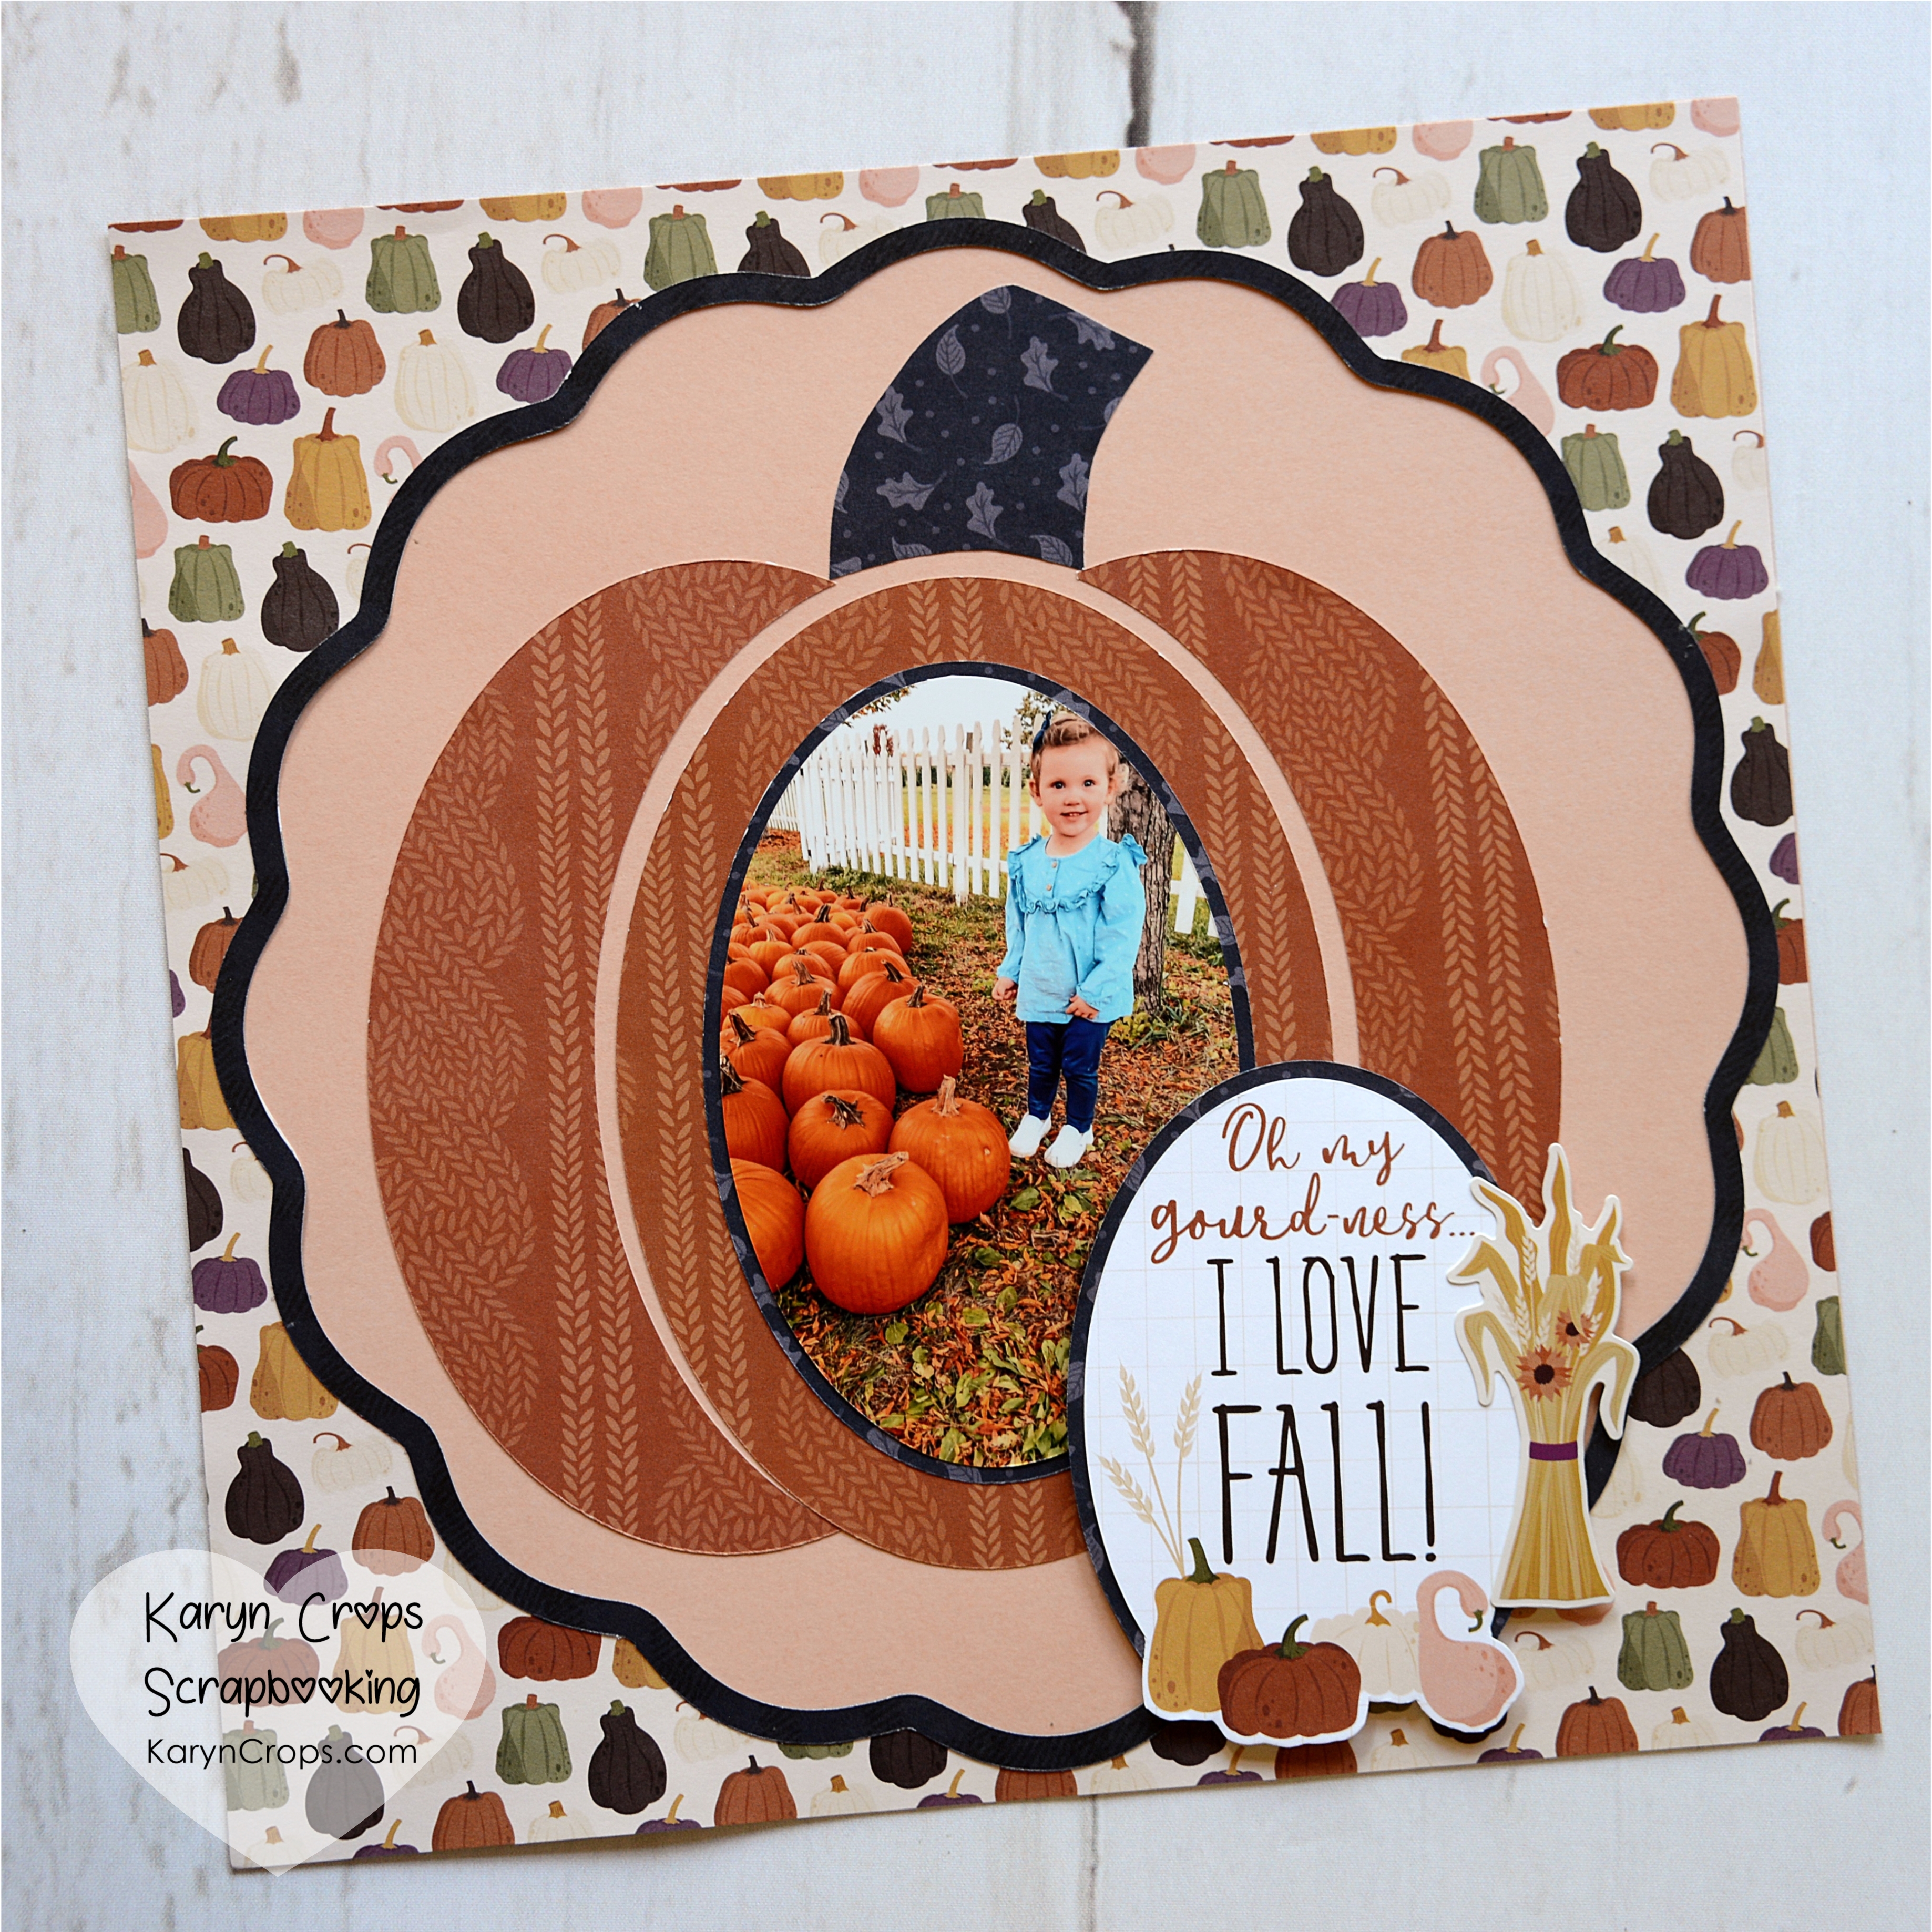
I created my second layout with the relief piece of gourd print paper that was leftover from my first layout. I also used a sheet of Blush Cardstock that was part of the Cardstock Buffet offered by Creative Memories this past summer.
About four times a year, Creative Memories offers either a Cardstock and/or Paper Buffet Promotion where exclusive shades of cardstock or paper are available. These colors are unique and not part of our normal product line, however they are designed to coordinate with up-coming collections. On November 1st, CM launched a new Paper Buffet that features six unique colors of solid-core paper. The solid core papers have a paper weight of 45 pounds and are lighter than our normal cardstock but heavier than our designers papers. If you purchase six packs, you receive a FREE pack of Parakeet Shimmer Cardstock. These unique colors should coordinate with up-coming collections.


To create my layout:
1. Adhere the leftover piece of gourd paper from my first layout to a sheet of Blush Cardstock. Alternatively, use the CCS with the Jumbo Scallop Circle Pattern (or substitute another jumbo pattern) and Red Blade on the outside edge to cut a piece from gourd paper. Use the relief piece.
2. Use the CCS with Jumbo Scallop Circle Pattern and Blue and Red Blades on the outside edge to cut a hollow frame from purple paper. Cut with the Blue Blade first and without moving the pattern, cut again with the Red Blade. Adhere to the layout as shown.
3. Use the CCS with the #4 or largest Oval Pattern and Blue Blade on the outside edge to cut one oval from orange print paper and two partial ovals.
4. Adhere the ovals to the center of the layout leaving about 1/4″ in-between the pieces as shown.
5. Freehand draw/cut a stem from purple print paper. Adhere as shown.
6. Use the CCS with the #3 Oval Pattern (third largest) and Green Blade on the outside edge to cut a photo mat from purple paper. Use the Red Blade on the outside edge to cut a photo. Layer, and adhere to the layout.
7. Use the CCS with the #2 Oval Pattern and Red Blade on the outside edge to cut partially around the title in a variety mat. Use the Green Blade on the outside edge to cut a mat from purple paper. Layer, and adhere to the layout with Foam Squares.
8. Add a sticker with Foam Squares.
To purchase the tools and materials that I used, please see my Creative Memories website. Thank you so much for any orders!
If you’re looking for a fun virtual scrapbooking event with some great versatile double-page layout ideas, you might consider joining me and my teammates at Creative Life Scrapbooking for our PJ Party Virtual Crop on Friday, November 5th.
If you can’t join us on Zoom on the 5th, that’s okay. All of the instructional sessions will be recorded and shared in a private Facebook group and can be viewed at your leisure. We will also share printable instructional handouts. The group will be active for the entire month of November as participants make our layouts and share their versions.
Please see our website for more information and to register.

Happy Scrapping!
Karyn


