
Hello! Today I’m sharing a double-page layout that I created with the Genuine Paper and Stickers from Creative Memories. I originally shared this idea at our Creative Life Scrapbooking PJ Party (virtual crop) last week. This new collection is great for your masculine and outdoor photos. It features shades of green and blue but also has pops of ivory, burnt orange and poppy red. The paper consists of small neutral prints along with plaid, stripes, houndstooth, and wood-grain prints.
The tools that I used mimic the forest background of my photos and really brought my layout to life. CM’s new Timeless Tweed Border Maker Cartridge is obviously great for masculine layouts and coordinates nicely with the Genuine Collection, but I also envision using it for playful layouts featuring my grandchildren. I also used my current favorite CM tool – the Pine Tree Punch. This punch sold out quickly when it was first introduced in October and is now back in stock. This is a must-have punch for outdoor and Christmas layouts. Please order it sooner than later as it will likely sell out again.

I designed my layout to conserve paper, so the backgrounds consist of strips of the green print paper and the wood-grained paper that have been taped together to create 12″ x 12″ sheets.
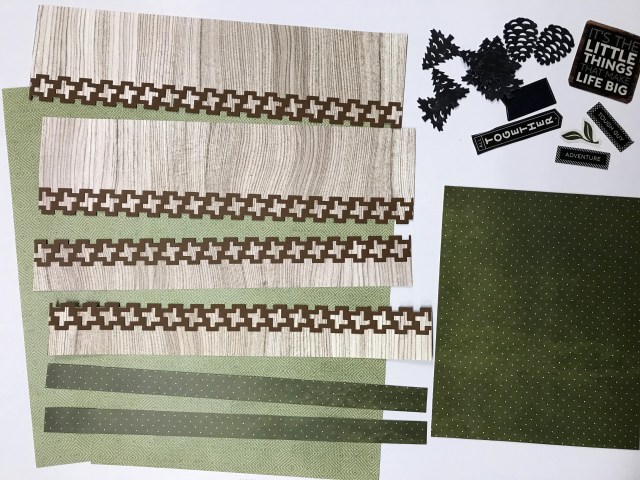
1. Cut 2 pieces of the light green paper to 12” x 9”.
2. Cut 2 pieces of the wood-grained paper to 12” x 3” and two more pieces to 12” x 1-1/5”.
3. Adhere the wood-grained pieces onto the light green pieces making two 12” x 12” pages for your backgrounds. Use your cutting mat to help you line-up the strips making sure that they’re straight and also that your finished piece measures 12″ x 12″. See photo below.
4. From brown cardstock, use the Original Border Maker with the Timeless Tweed Border Maker Cartridge to punch 4 borders and adhere as shown using the Repositional Tape Refill.

5. From the dark slate paper, use the Pine Tree Punch to punch 16 trees and adhere across the tops of your two pages. Use CM’s Repositionable Tape to help you get your trees in a straight line.
6. Cut a piece of dark green paper to 8-1/2” x 6-1/2” and adhere to your first page.
7. Cut 2 pieces of dark green paper to 12” x ¾” and adhere behind the tops and bottoms of photos on your second page.
8. Add a journaling box, Pine Cone punch-outs, and stickers as desired.

Thanks much for visiting with me today, and please let me know if you have any questions. You may purchase the tools and materials that I used on my Creative Memories website. (Remember to include the Pine Tree Punch in your order.)
I’ll be back at the end of the month with some winter layouts for our Creative Life Scrapbooking Winter Blog Hop. See you then!
Karyn
