Brrr! It’s a blistery 8 degrees here in central Illinois today—absolutely perfect weather for scrapbooking! I’m hunkered down and busy designing layouts that I’ll be teaching at my upcoming weekend scrapbooking retreat on February 12–15. But I also have some other layouts to share with you right now, so you can start creating today!

For my February Technique Layout, I created a beautiful wintery design in shades of blue and tan using the new Winter Bliss Collection from Creative Memories. I also used the Custom Cutting System with the Jumbo Circle Pattern, along with the Gingerbread Border Punch, Dancing Snowflakes Border Punch (sold out), and Ice Skate Punch (retired)—all from Creative Memories. This layout is easily adaptable using any papers and any combination of punches you have on hand.
👉For a step-by-step demonstration, be sure to watch my YouTube video. At this time, there is no printable handout available for this layout.

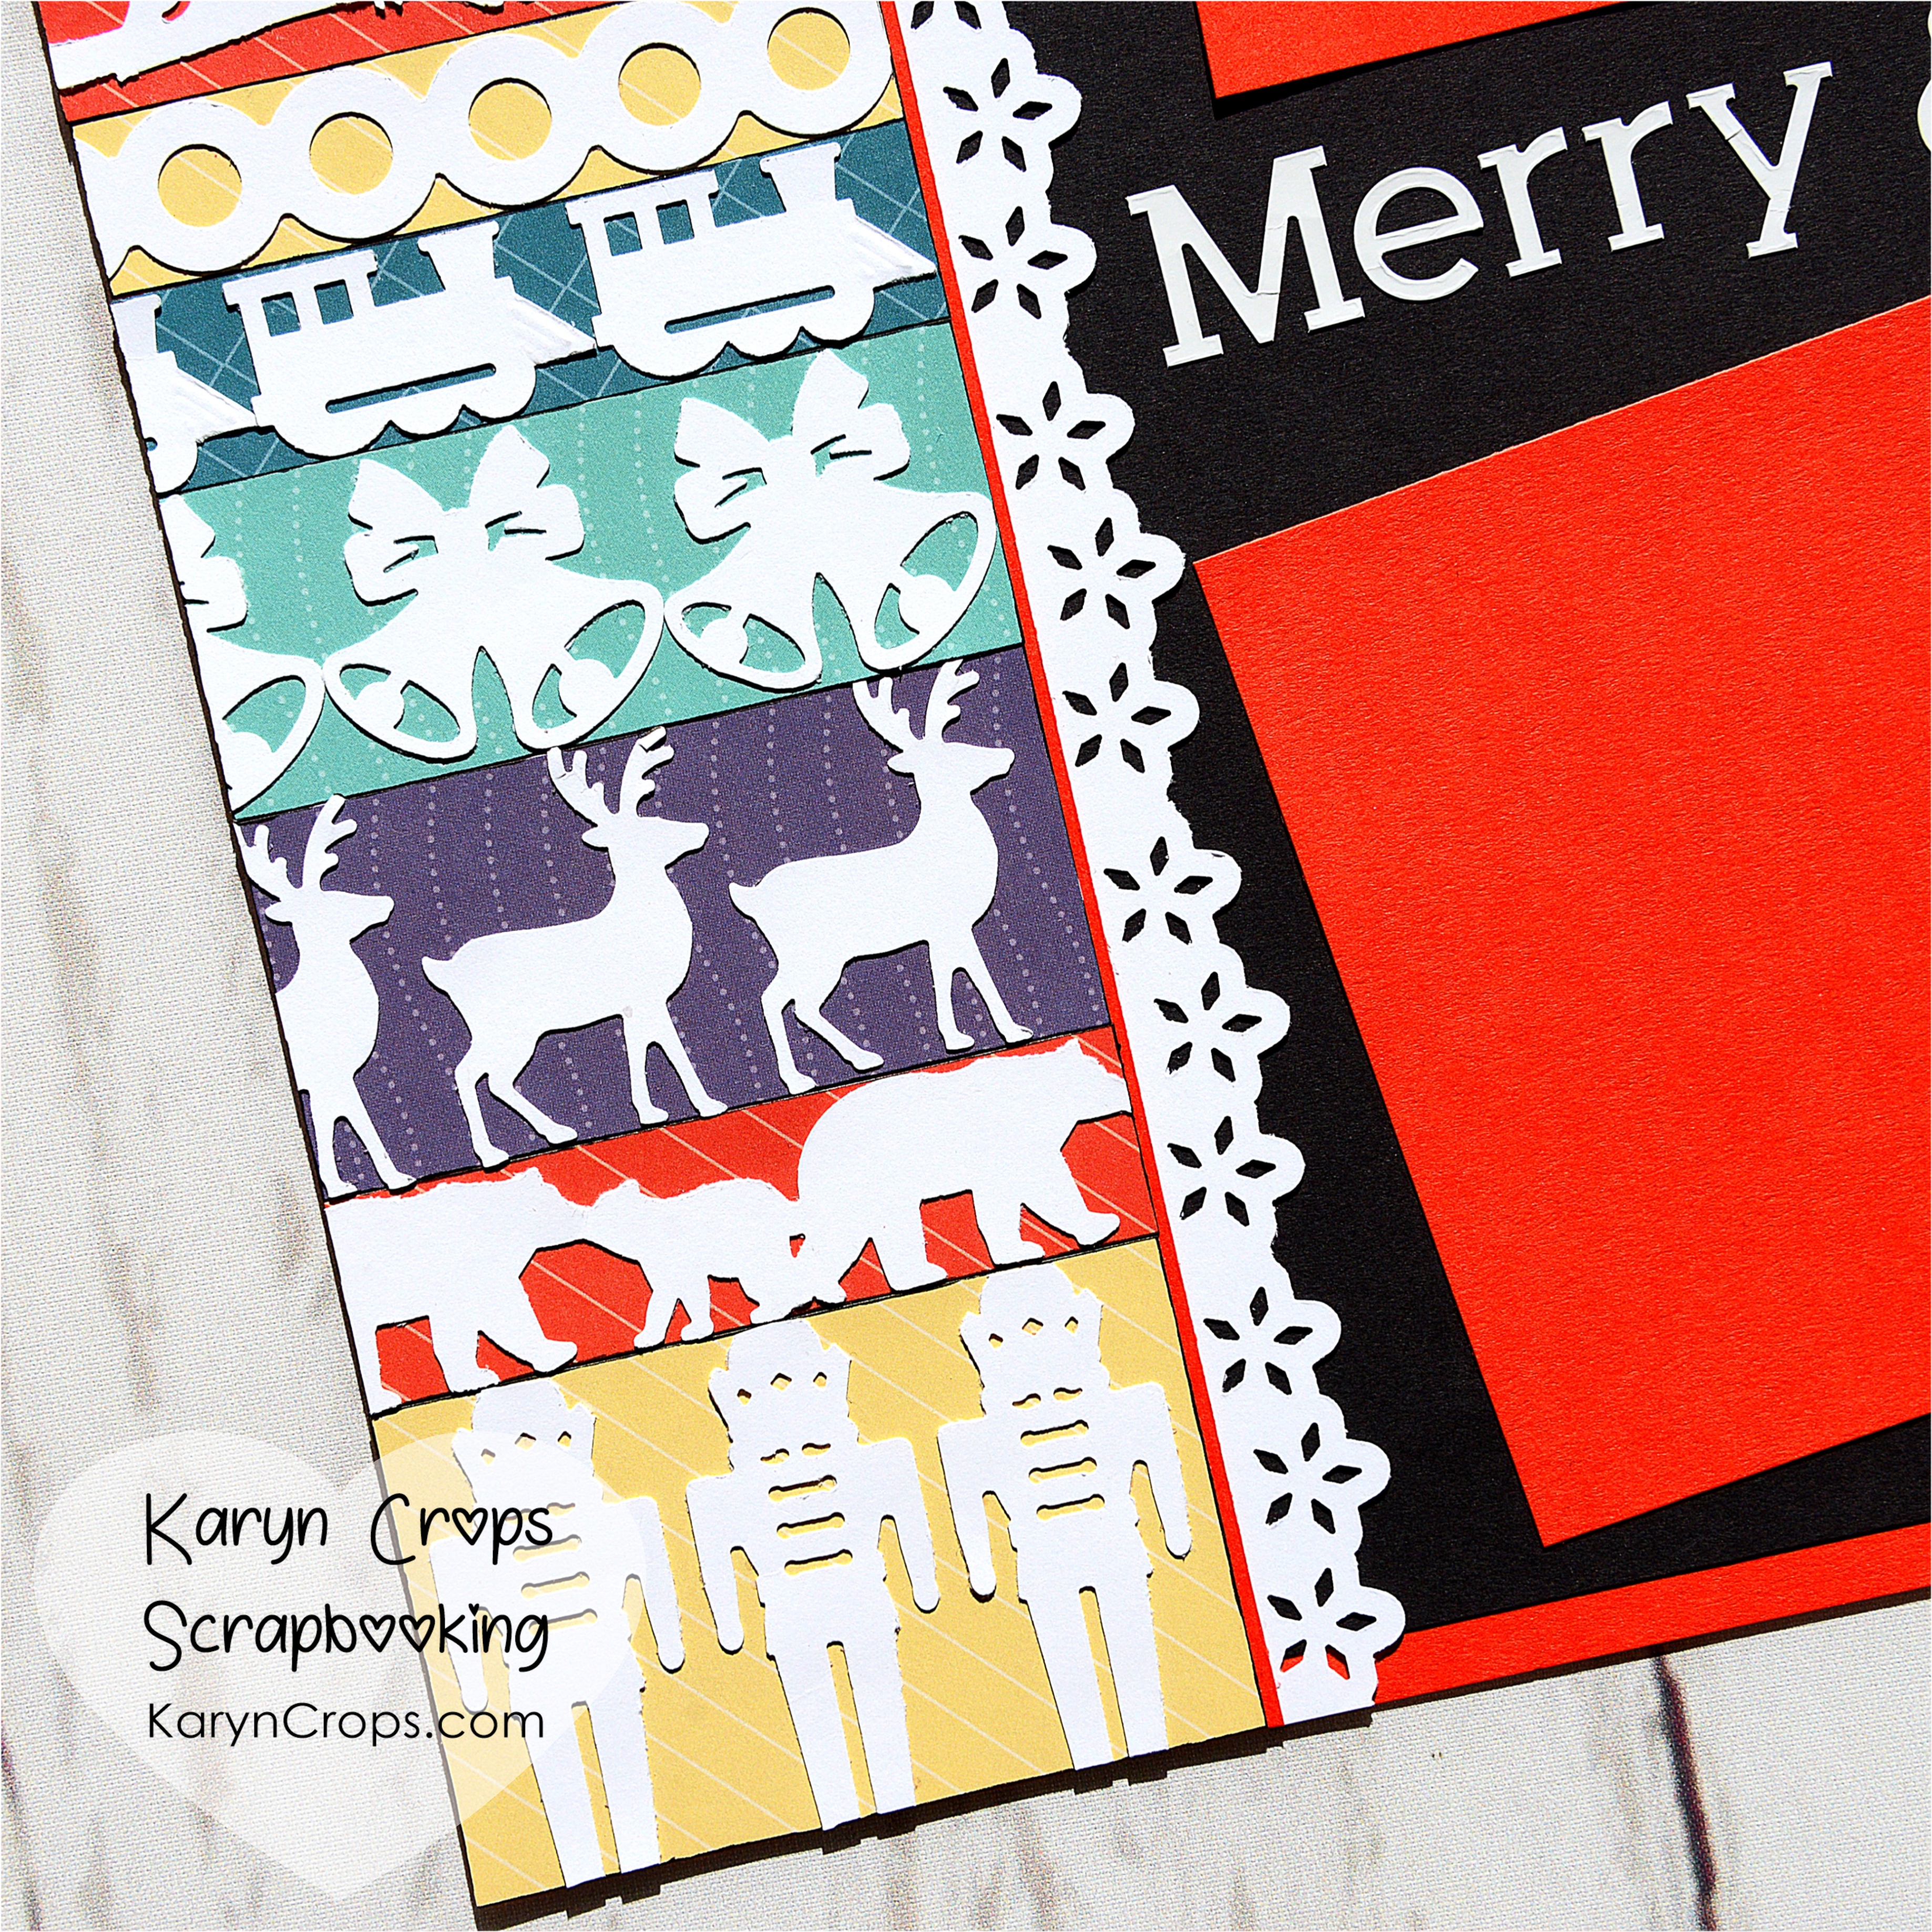
Last week, Creative Memories introduced the NEW On the Bright Side Collection, featuring the Whimsical Scallop Border Punch. I was delighted to create the marketing layouts for Creative Memories using this cheerful new collection. I loved working with the joyful color palette and playful paper designs—they’re such a treat to create with!
👉You’ll find step-by-step instructions for recreating this layout on the Creative Memories blog.
The Winter Bliss Collection, Gingerbread Border Punch, On the Bright Side Collection, and Whimsical Border Punch are all available for purchase through my Creative Memories website.
👉 Click here to shop with me!
When you shop through my link, you’ll be automatically enrolled in my Customer Rewards Program—and I’m excited to share a brand-new first quarter Customer Rewards gift with you!

Do you love your Border Maker System and love playing with your Border Maker Cartridges? You’re going to have a lot of fun creating this layout that I created for Creative Life Scrapbooking! I made this super cute layout to showcase photos of me with friends and family wearing our holiday sweaters and t-shirts. I have a fun collection of Life is Good t-shirts that I love wearing during the holiday season. The sweaters on this layout would also look adorable created in shades of blue for a cozy winter-themed layout.
👉You can find the instructional handout in the Shop section of the Creative Life Scrapbooking website.

Would you love some fresh scrapbooking layout ideas? Join me and my scrappy friends for our upcoming Creative Life Scrapbooking PJ Party Virtual Crop — a fun evening of creativity and connection!
We’ll be sharing 7 double-page layouts, each featuring a unique scrapbooking technique. These layouts are versatile and perfect for helping you scrap your stash!
The virtual crop begins on Friday, January 23rd with our Zoom session. We’ll create 4 layouts together on Zoom, and the instructions for 3 more additional layouts are shared in the private Facebook group for the event. The private group is open so you can begin printing the instructional handouts and creating the Pre-Party Layouts. The Zoom sessions will also be recorded, and you’ll have an entire month to complete your layouts for door prize entries. Plus you’ll enjoy an entire month of inspiration as participants share hundreds of layout examples following the live event!
![]() Special Offer: Register now with our COMBO for all 4 PJ Parties in 2026 and receive a discounted price!
Special Offer: Register now with our COMBO for all 4 PJ Parties in 2026 and receive a discounted price!
![]() For details and to register, visit: www.creativelifescrapbooking.com.
For details and to register, visit: www.creativelifescrapbooking.com.


Happy Scrapping!
Karyn