
It’s the most wonderful time of the year – an entire month of colorful lights, giving and celebrating! I’ve been feeling a bit nostalgic lately and have been reminiscing about Christmas past. As a youngster, we celebrated Christmas Eve with a large gathering of grandparents, aunts and uncles and LOTS of cousins. My aunts led sing-alongs, and the 12 Days of Christmas was always a jolly affair with different groups of people singing for each day. My dad had a beautiful singing voice, and I always sang one of the days with him. I created this colorful layout to duplicate the 12 Days of Christmas with some of the punches and border maker cartridges from Creative Memories.

Creative Memories didn’t have any exact matches, but we’ve had the Songbirds and Cardinals Border Punches which sufficed for turtle doves and a partridge. The old Circle Chain Border Maker Cartridge was perfect for five golden rings. And I have some nutcrackers cracking, polar bears plunging, reindeer leaping, bells a-ringing, and trains a-tooting. Take a look at your punches and border maker cartridges and see what you can create using this idea!
Also make sure to check out Creative Memories Holi-Deals special which just began! CM is offer 30-40% off select items and also a BOGO special for selected punches and cartridges. You’ll find some of the punches and cartridges that I used in the DEALS section of the website as BOGO items – Polar Bear Border Punch, Cardinals Border Punch, Bells & Bows Punch, and the Poinsettia Border Maker Cartridge.
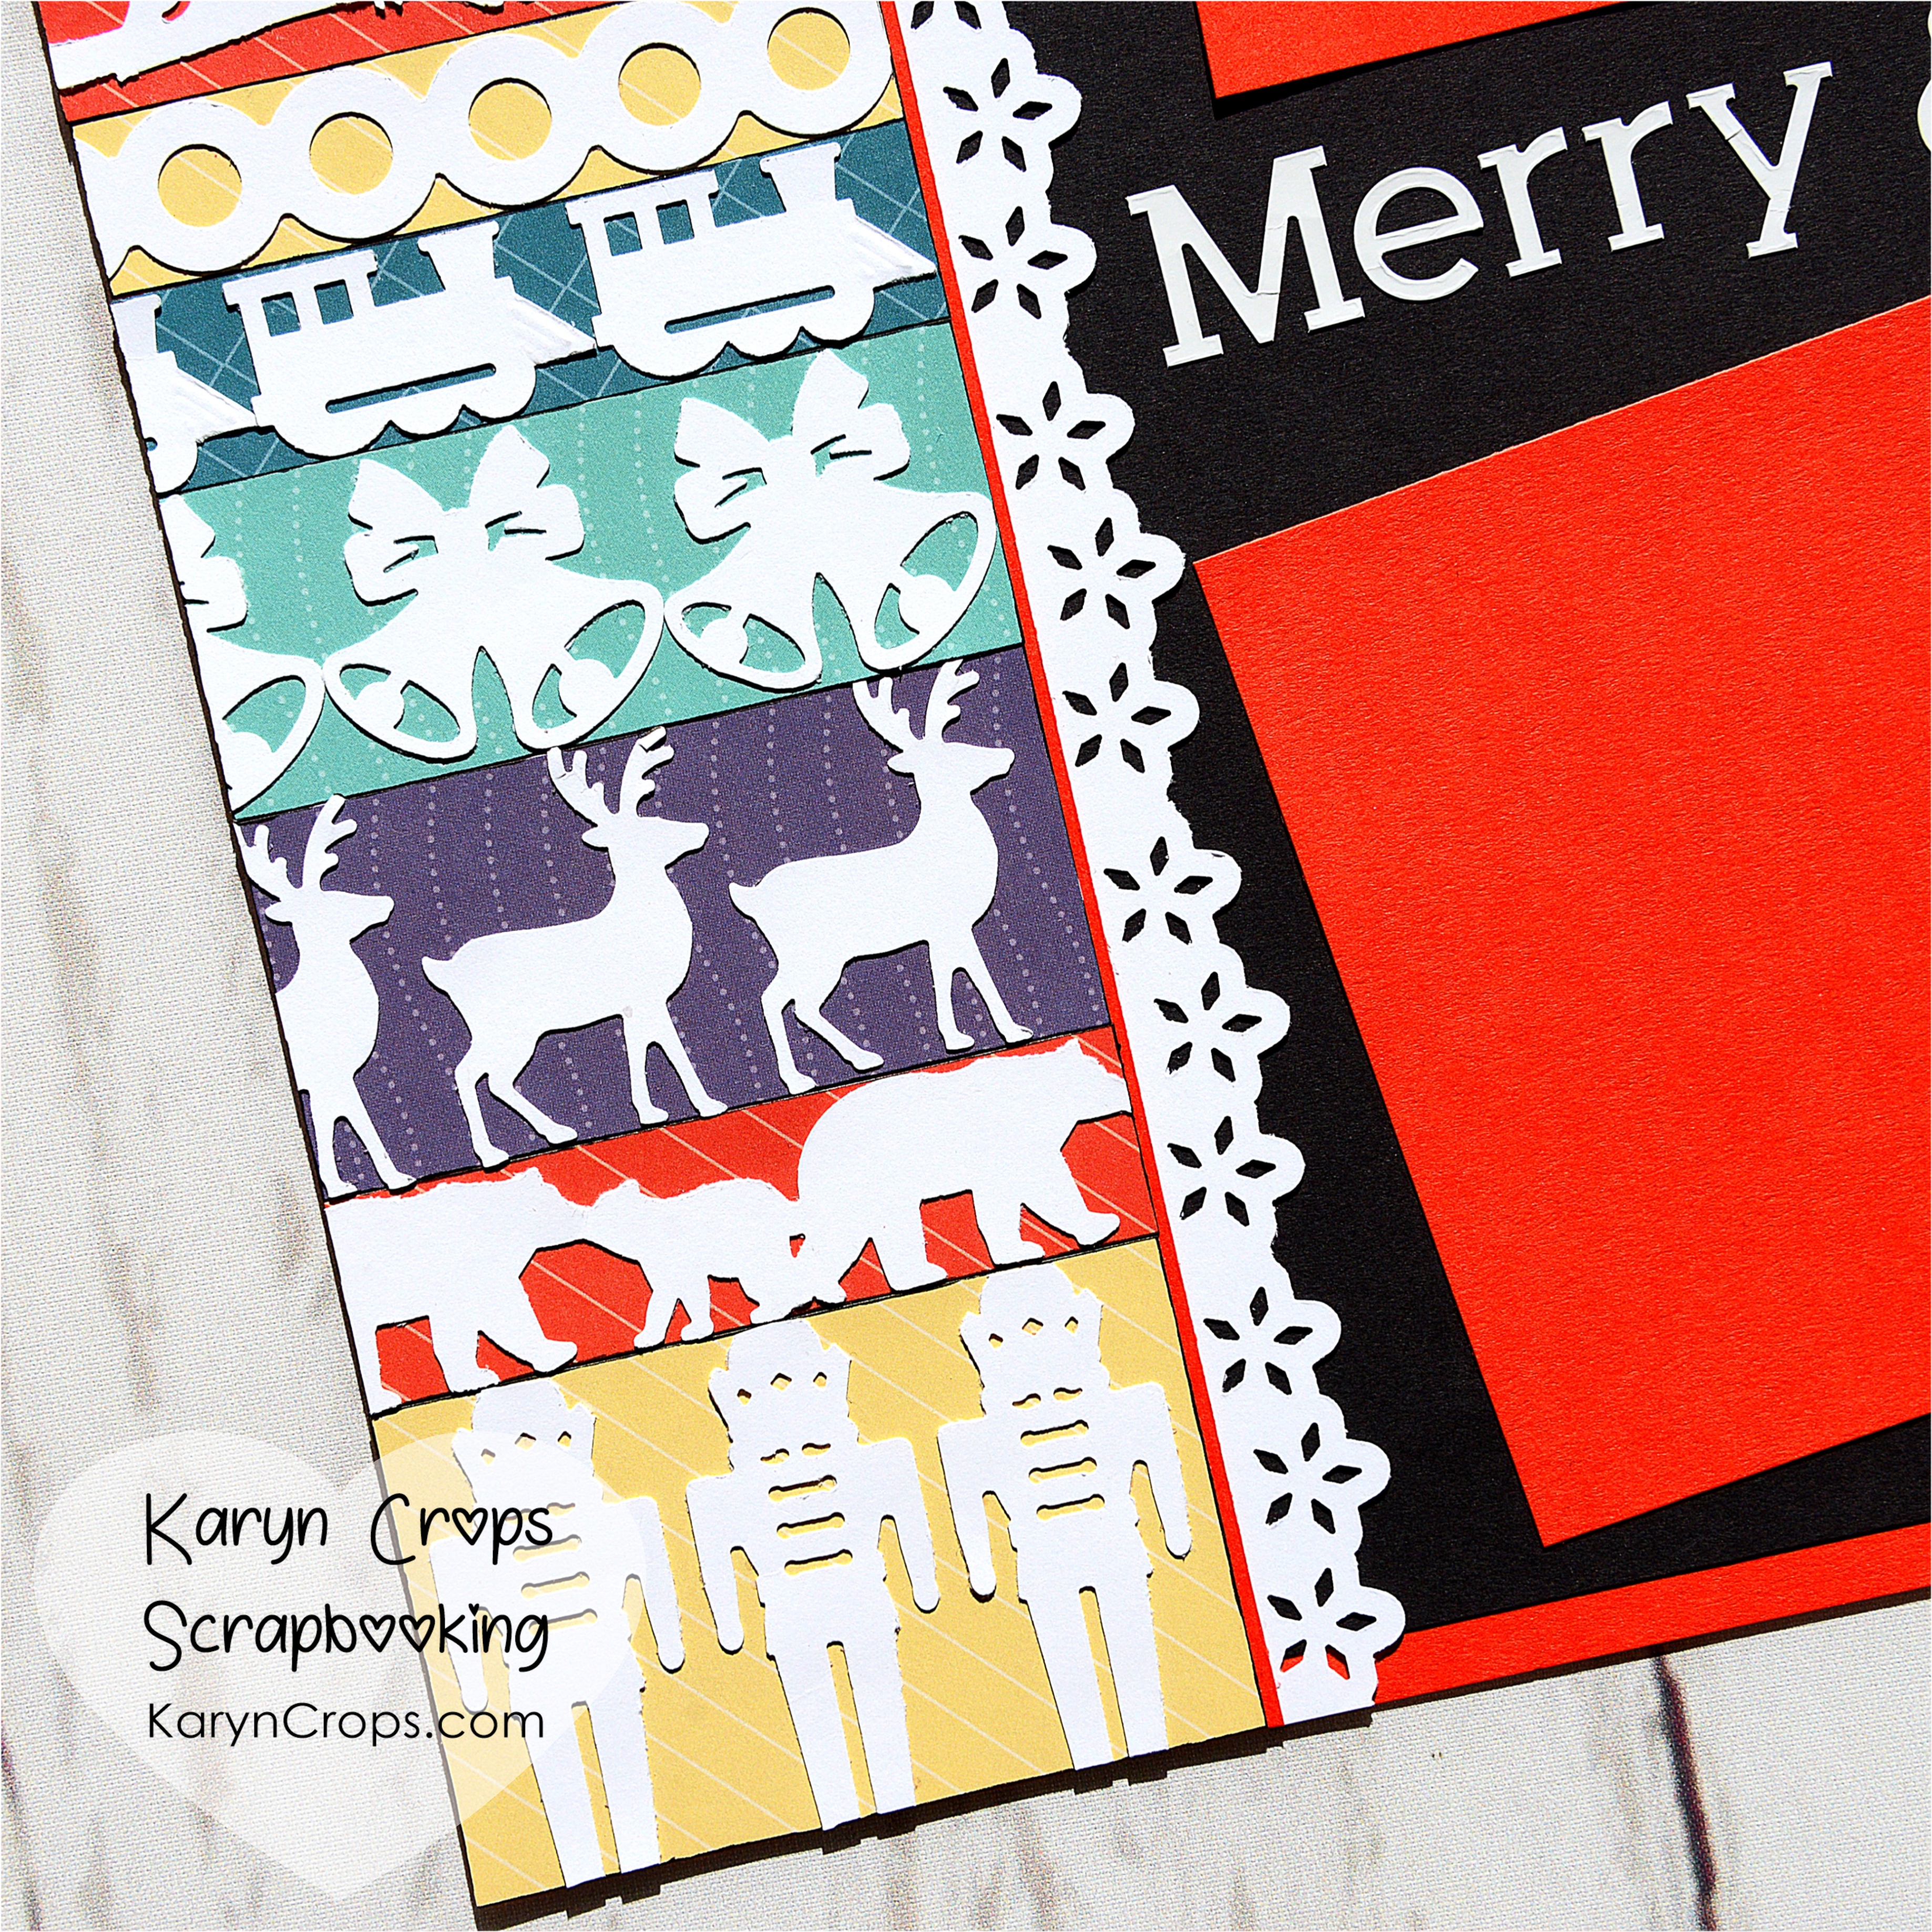
Your challenge will be to cut background strips that create a 12″ panel. I had to trim down my nutcrackers, songbirds, and cardinals to make them fit on my strips. From top to bottom, my strips measure: 1-1/8″, 1″, 7/8″, 1″, 3/4″, 7/8″, 1-3/8″, 1-11/16″, 15/16″, 2-1/8″. All are 3-1/2″ wide. I used the This Life Krafted Rainbow Paper for my strips and Bright White, Black and Red Cardstocks.
If this layout reminds you of a Christmas sweater, make sure to see the Creative Life Scrapbooking Facebook Page tomorrow, December 4th as we share a spectacular Christmas sweater layout for our Annual Holly Days feature! From December 1st-7th, the Creative Life Scrapbooking team is sharing a new holiday layout for Holly Days. We also have a Holly Days Sketch Book available for a special holiday price on our website at www.creativelifescrapooking.com. Below is the layout that I shared with CLS on December 1st.

While you’re at the Creative Life Scrapbooking website, make sure to register for our 2025 PJ Party Virtual Crops at our discounted Combo pricing! The CLS designer team and special guest designers share versatile double-page layouts that each feature a technique. There are no special materials or tools to purchase, and we encourage you to use your stash, and we make tool substitution suggestions. There are live Zoom sessions and pre-recorded sessions and all layouts feature a full-color step-by-step printable handout. We also host private Facebook groups for the parties where participants share hundreds of versions of our layouts for an entire month of fun and prizes! (For my January 2025 PJ Party layout, I used the Mandala Burst Border Punch. This is a BOGO punch right now with Creative Memories, so it’s a great time to purchase it if you don’t already have this one.)

Happy Scrapping!
Karyn


